Sunday, December 25, 2011

Christmas, Navidad, Noel...

***This post is dedicated to my lovely sister who helped out with this beautiful cake and the photography!***

It's beginning to look a lot like Christmas [insert Michael Buble voice], everywhere you go ...

I can't believe Christmas already came and went. I wait all year long for a couple of days of holidays that fly by in the blink of an eye. It's quite sad to think that now I have to wait another 340 days until next December comes along.

Fortunately, New Years Eve is close by and it's what is keeping my excitement alive.

But let's go back to talking about Christmas because it really is the most wonderful time of the year. Or at least I think so.

What's not to like about Navidad; family gatherings, presents, snow if you're lucky, getting dressed up, etc. and lots and lots of food!


This Noel, was bursting with family traditions. Lunch with my mom's family on the 23rd--it's usually on the 25th, but due to itineraries, we had it earlier--, dinner with my dad's family on the 24th, and a second lunch with the remaining of my mom's family today.

The reason why I love this holiday so much is that I get to see my cousins, aunts and uncles--or most of them. With a family like mine (spread out around the world) it's hard to come together, but Christmas seems to be a good enough reason.

Anyways, moving on to food. I decided to bake a layer cake for my Christmas Eve dinner. Before anything, let me tell you that despite the flaws on the inside the cake looked amazing from the outside and tasted delicious.


I wanted to make something like this cake, but I didn't make enough batter and before I knew it there was no time left. I will be trying to bake a similar cake in the near future, but for now, I am proud of the awesome cake we (my sister and I) baked last night.

(All recipes adapted from I Am Baker)

Vanilla Cake (Doubling the recipe will probably make the cakes thick enough to form a pretty Christmas Tree inside)

  • 1 1/2 cups all purpose flour
  • 1 1/2 teaspoons baking powder
  • 2 sticks unsalted butter, softened
  • 2 cups sugar
  • 4 large eggs, at room temperature
  • 1 cup milk
  • 1 teaspoon vanilla extract
  1. Preheat oven to 350 F. Butter two 9-inch round cake pans and line bottoms with parchment paper. In a small bowl, sift flour and baking powder and set aside.
  2. In a large bowl, cream butter with an electric mixer on medium speed until smooth. Add sugar gradually and beat until fluffy, about 3 minutes. Add eggs, one at a time, beating well after each. 
  3. Add dry ingredients in three parts, alternating with milk and vanilla. Make sure to beat well after each addition, but don't over beat.
  4. Using a rubber spatula, scrape down the batter in the bowl to ensure ingredients are blended. Carefully spoon the batter into prepared cake pans. Bake for 30-35 minutes, or until toothpick inserted in center comes out clean. Let cool completely.
  5. Once cakes are cooled, carefully cut a small cone into the center of each, making sure one of the cuts reaches the bottom of one cake. Fill both holes with Green Velvet Cake and place in freezer for about 20 minutes. 
  6. Remove cakes from freezer and mount one on top of the other. Turn the cake with the larger cone upside down and spread Buttercream Frosting onto the the bottom, making sure not to cover the green tip. Turn the other cake upside down and place on top.
  7. Using a serrated knife, even out the cakes by cutting the edges. 
  8. Cover cake with remaining Buttercream Frosting using an offset spatula to even the frosting out. Decorate cake with trees made out of remaining Green Velvet Cake or other decorations.


Green (Red) Velvet Cake

  • 1 3/4 cup all purpose flour
  • 3/4 stick unsalted butter, softened
  • 2 cups sugar
  • 1 large egg, at room temperature
  • 1 egg yolk, at room temperature
  • 1 tablespoon green food coloring
  • 1 1/2 tablespoons cocoa
  • 1 1/4 teaspoons vanilla extract
  • 3/4 teaspoon salt
  • 3/4 cup buttermilks (or half milk and half yogurt)
  • 3/4 teaspoon apple cider vinegar
  • 3/4 teaspoon baking soda
  • 1/2 cup Buttercream Frosting


  1. Preheat oven to 350 degrees. Grease one 9.5 inch round baking pan. 
  2. In a small bowl sift flour and set aside. In a large bowl, cream butter and sugar, with an electric mixer on medium speed, until light and fluffy. Add egg and yolk, one at a time, beating well after each addition.
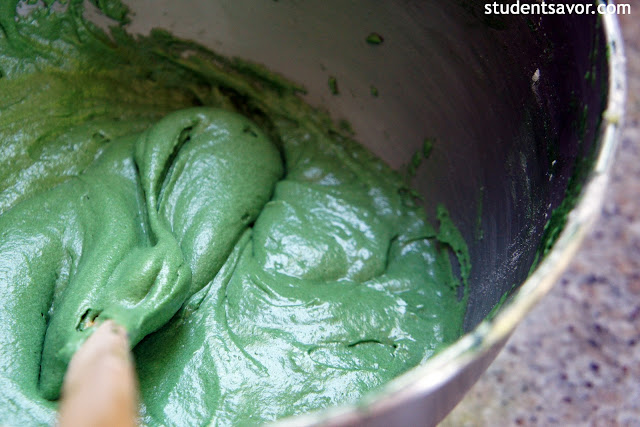
  3. In a separate bowl, combine food coloring, cocoa and vanilla. Add to batter and beat well. 
  4. Combine salt and buttermilk. Add to batter in three parts, alternating with flour; making sure to beat until incorporated after each addition (but don't over beat).
  5. In a small bowl, stir together vinegar and baking soda. Using a plastic spatula, fold into batter until incorporated and batter is smooth.
  6. Pour batter into pan. Bake for 30-40 minutes, or until toothpick inserted in the center comes out clean. Remove from oven and let cool for 10 minutes. 
  7. Using a fork, crumble cake. Add 1/2 cup frosting and combine. Set aside until ready to use.


Buttercream Frosting
  • 2 sticks unsalted butter, softened
  • 7 cups confectioners sugar
  • 3/4 cup milk
  • 2 teaspoons vanilla extract
  1. In a large mixing bowl, cream butter, 4 cups sugar, 1/2 milk and vanilla, beating on medium speed until smooth and creamy, about 5 minutes. Gradually add remaining sugar, 1 cup at a time, beating well after each addition, and until icing is thick enough to spread. If icing is too thick, add milk, 1 tablespoon at a time, until desired consistency.
  2. Leave icing at room temperature until ready to use.

Monday, December 19, 2011

Its winter! Let's eat toffee.

Here I am, sitting at Logan Airport waiting for my flight to board.

I'm thinking "What could I possibly do with all this extra time on my hands?"--now that the super hectic Fall 2011 semester is behind me--and then I realize I have a blog that I've been ignoring for the past four months.


Now before I blog about food, I'll share a little bit about life.

I turned 22 yesterday. (Insert angry/sad/annoyed face here). If you don't know this about me already, I hate getting older. Sure, I am approaching the peak of my life (blah blah blah) and I am probably overreacting about my age, but the fact is, time is really flying by and I am not liking it. I want to be a kid again. I want to go back to my high school graduation; or to the moment I moved into my first (or second) apartment. Please someone come up with a solution for me!


Enough of my age-related rambling. Let me talk about the amazing winter break that awaits: two places, two climates, two holidays and hopefully a whole lot of presents! Oh and in between the celebrations and relaxation I have a magazine to plan.


TasteBUds is up and running, but it needs a lot of tweaking and organizing. Here is a our first issue.


Anyways, during break, I plan on spending some time setting next semester's deadlines, compiling a style and writing guide, contacting advertisers and testing recipes for our next issue.


Ok, now it's time to talk about food. Here is the toffee I made for a holiday party a couple of weeks ago. I tweaked this recipe a little because honestly there was not enough chocolate in it! At least not in my book. Oh and also, be prepared to stand near the stove for a long time.


Almond Toffee (adapted from Martha Stewart)

  • 1/4 pound whole almonds
  • 3 sticks salted butter
  • 1 1/2 cups sugar
  • 12 oz. bittersweet chocolate
  1. Preheat oven to 350 F. Spread almonds evenly on rimmed baking sheet and put in oven. Roast until fragrant, but not burned, about 15 minutes. Remove almonds from oven and let cool. Transfer to Ziploc bag and pound nuts, using a heavy object, until coarsely ground.
  2. Melt butter in a large heavy pot over medium-high heat. Add sugar and continues stirring until toffee reaches 305 F on a candy thermometer, about 30 minutes.
  3. Pour toffee onto rimmed baking sheet, spreading evenly to cover. Let cool until slightly hardened but still tacky. Run a knife along edges of sheet to facilitate removal later.
  4. Meanwhile, melt chocolate in a bowl set over simmering water. Remove chocolate from heat and let cool, about 2 minutes. Immediately pour chocolate over toffee and spread evenly. Sprinkle ground almonds over chocolate; pressing down gently with a spatula.
  5. Transfer toffee to refrigerator until set, about 1 hour. To remove from pan, run sharp knife around edges and lift toffee from the bottom. Break into large pieces using hands and store in freezer until ready to serve.


Sunday, December 11, 2011

Cupcakes Galore

So remember the food magazine I told you I was planning to start? It's happening now.

Name: TasteBUds. Goal: Bring students and others at BU a food magazine packed with recipes, reviews and much more.

The Bake Sale Issue--our first mini half-issue--went online about a week and a half ago. You can see it here or order it in print here. It includes all the recipes that we made for the bake sale we had to raise funds so that we can have a print issue next semester.

Anyways, tomorrow we are having another sale, except this time it's all about cupcakes. Only cupcakes.


So, today I made my share of cupcakes for the sale. It was quite a bit of work, but thanks to my lovely new gadget (the KitchenAid electric mixer I bought after Thanksgiving) it was successful. I made three different types: Red Velvet Cupcakes with Mascarpone Icing and Peppermint Crumbles, S'mores Cupcakes, and Vegan Chocolate Cupcakes with Vanilla Frosting.


The hardest batch to make was the S'mores. They are a true Martha Stewart recipe: complicated and time consuming, but worth the work.

Before we get to the good stuff, any BU students reading this, stop by the GSU Link tomorrow from 11 a.m. to 5 p.m. and try them out! Everybody else, enjoy the photos!

S'mores Cupcakes (adapted from Martha Stewart)
Active time: 40 minutes. Total time: 60 minutes + cooling.
Makes 2 dozen cupcakes.

  • 2 1/4 cups + 2 tablespoons sugar
  • 1 3/4 cups all purpose flour
  • 3/4 cup + 1 tablespoon cocoa powder
  • 1 1/2 teaspoons baking powder
  • 1 1/2 teaspoons baking soda
  • 1 teaspoon salt
  • 2 large eggs
  • 1 cup 2% milk
  • 1/2 cup vegetable oil
  • 2 tablespoons vanilla extract
  • 1 cup boiling water
  • 1 1/2 cups graham cracker crumbs (from about 20 squares)
  • 9 oz. semisweet chocolate chips
  1. Preheat oven to 350 F. Line 2 standard muffin tins with cupcake liners and set aside.
  2. In the bowl of an electric mixer, sift 2 cups + 2 tablespoons sugar , flour, cocoa, baking powder, baking soda and salt. Mix ingredients, using paddle attachment, on low speed.
  3. In a separate bowl, mix eggs, milk, oil and vanilla. Add to flour mixture and beat on medium speed for 30 seconds. Scrape sides and continue mixing on medium speed for about 2 minutes or until batter is incorporated. Add boiling water and stir to combine. Set aside.
  4. In another bowl, combine cracker crumbs, butter and remaining sugar and stir until combined.
  5. Place 1 tablespoon graham cracker mixture in the bottom of each cupcake liner. Use bottom of a small jar or glass to press the crumbs down. Keep the rest of the graham cracker mixture for topping.
  6. Add about 7 chocolate chips to each muffin cup. Place prepared crusts in the oven and bake for 5 minutes, or until crumbs are golden and chips are melted. 
  7. Remove pan from oven and fill cupcakes 3/4 of the way. Sprinkle cupcakes with remaining graham cracker mixture. Bake cupcakes for 20 to 22 minutes, or until toothpick inserted in the middle of one comes out clean. Remove form oven and let cool completely.


Marshmallow Frosting (adapted from Martha Stewart)
Active time: 20 minutes. Total time: 30 minutes.

  • 8 egg whites
  • 2 cups sugar
  • 1/2 teaspoon cream of tartar
  • 2 teaspoons vanilla extract
  1. Place egg whites, sugar and cream of tartar in the bowl of an electric mixer. Set over a saucepan with simmering water and whisk constantly until sugar is dissolved and mix is warm to the touch, about 4 minutes.
  2. Remove bowl from water. Beat with whisk attachment, starting on low speed and gradually increasing to high until stuff, glossy peaks form, about 7-10 minutes. Add vanilla and mix until combined.
  3. Transfer frosting to a large pastry bag fitted with a large round tip; pipe frosting in a spiral motion on each cupcake. 

Thursday, December 1, 2011

The Week After Thanksgiving + One Last Treat

Remember how I said I was going to go back to my old ways of blogging; or at least try to post more than once every two weeks? Well it looks like that will not be possible until after finals.

Seriously, this semester has really tested my time management skills--and I wish I could say they're superb, but apparently they're not. Anyways, I couldn't even get around to my last installment of the Thanksgiving series until today. It was mainly due to the fact that I slacked all break long and then once I landed in Boston I realized how much work I had.

But here it is, the last--and my favorite--post about the Thanksgiving feast my cousin and I made a week ago.


Before anything though, let me state the facts. I have a huge sweet tooth. When I say that, I mean I'd rather skip a meal if it means I get to eat double the dessert. It's obviously not the best eating habit, but that's just the way I am.

For Thanksgiving I didn't skip dinner--as you can see from the previous posts--but I still had two servings of this delicious caramel cheesecake. That leads me to fact number two: my favorite desserts are by far cheesecake and carrot cake.

So here is the recipe to an absolutely delicious--but seriously, delicious--cheesecake. Enjoy!

Caramel Cheesecake (adapted from Joy the Baker)
Makes one 9-inch pie.
*Active time: 1 hour. Total time: 3 hours + cooling (overnight is best)

Crust:

  • 10 oz ginger snap cookies
  • 2 tablespoons brown sugar
  • Pinch of salt
  • 4 tablespoons unsalted butter, melted
  1. Place two racks in the upper and lower thirds of the oven. Preheat oven to 350 F.
  2. Place cookies in a Ziploc bag and crumble using a rolling pin (or an empty wine bottle); until crumbs are fine. Transfer crumbs to a large bowl. Add sugar, salt and butter and mix until crumbs are moistened. 
  3. Fill a 9-inch pie plate with crust and press against bottom and edges using your fingertips. Make sure the crust is pressed completely.
  4. Bake for 10 to 15 minutes, or until golden brown. Remove from oven and let cool while you make filling.

Filling
  • 2 blocks cream cheese, at room temperature
  • 1 1.3 cups granulated sugar
  • 1/2 teaspoon salt
  • 2 large eggs, at room temperature
  • 1/2 cup + 2 tablespoons heavy cream
  1. Preheat oven to 325 F. Fill tea kettle with water and bring to a boil (this water will be used when cheesecake is in the oven).
  2. Beat together cream cheese and sugar until fluffy, about 5 minutes. Beat in salt until well incorporated. Add eggs, one at a time, beating until very well combined. Slowly beat in cream until mixture is creamy and luscious.
  3. Pour cheesecake into prepared crust and set aside. Fill a 9x13-inch baking dish with boiling water and place in lower third of the oven. Place cheesecake on upper third of the oven and bake for 50 - 60 minutes, or until it is slightly browned and puffed. Once cheesecake is puffed and it doesn't jiggle in the center when moved, prop oven open using a towel and continue baking for 45 minutes. Remove from oven and let cool for at least 4 hours, or overnight.


Caramel:
  • 1/2 cup granulated sugar
  • 2 tablespoons water
  • 2 tablespoons light corn syrup
  • 1/3 cup heavy cream
  • 2 tablespoons unsalted butter
  • 1/2 teaspoon salt
  1. In a medium saucepan, heat sugar, water and corn syrup over medium heat. Bring to a boil, stirring occasionally; boil until caramel browns, about 5-10 minutes, make sure caramel doesn't go past an amber color. Remove from heat immediately and add cream and butter; caramel will bubble. Stir well and add salt until incorporated. 
  2. Transfer caramel to bowl and cover with plastic wrap (caramel may seem light, but once it's cooled it will thicken). Cool in refrigerator for at least 4 hours, or overnight. 
  3. When ready to use, if caramel is too thick to pour, heat in microwave for 10-second intervals, stirring well after each interval. Pour caramel over cooled cheesecake.
*Cool finished cheesecake in refrigerator until ready to serve.


Sunday, November 27, 2011

The Day After (Holiday Shopping) Part III

When I say "holiday shopping" I only mean shopping during the holiday. I know I should really be doing actual holiday shopping--i.e. looking for the multiple presents I have to give out for Christmas--but I couldn't stop myself from taking over my whole shopping spree.

If you were wondering, I did buy quite a lot, but in my defense, more than half was necessary. Really though. I am quickly growing out of my clothes, if not physically, style-wise.

Anyways, yesterday was the perfect second to last day to my Thanksgiving break. First of all, I rented a car for the first time and I drove it. I drove it in California freeways, which is my book is quite a challenge to get over. My cousin and I spent the beautifully warm day shopping at an outdoor mall. It was actually terrific! And that's not a word I use very often.

In the end, we came home early, crashed, did some school work coughnotreallycough and ended with a night out in Downtown San Diego. The highlight of the evening was definitely the 24/7 restaurant at which we ate after leaving the club at 2 a.m. If only Boston had anything of the sort, my life would be so much more joyful.

But enough of me. Here are the two vegetable recipes we made for our Thanksgiving feast. Easy to make and deliciously bursting with seasonal flavors. Enjoy


Brussels Sprouts and Shallot Hash (adapted from Epicurious)
*This is a Blue Ribbon Recipe
Serves 4

  • 3 tablespoons butter
  • 1/4 lb. shallots, thinly sliced
  • Salt & Pepper
  • 1 tablespoon apple cider vinegar
  • 2 teaspoons sugar
  • 1 1/2 tablespoons extra virgin olive oil
  • 1 lb. brussels sprouts, trimmed
  • 1/2 cup water
  1. In a medium skillet, melt 1 1/2 tablespoons butter over medium heat. Add shallots and season with salt and pepper. Saute until soft and golden, about 10 minutes. Add vinegar and sugar. Stir mixture, still over medium heat, until shallots are slightly browned and glazed, 3-5 minutes.
  2. Cut brussels sprouts in half lengthwise and slice into 1/8 inch pieces. In a large saucepan, heat olive oil over medium heat. Add brussels sprouts and season with salt and pepper. Saute until slightly browned, about 6 minutes. Add water and remaining butter. Cook until most of the water evaporates, making sure that sprouts are tender but still bright green, 3-5 minutes.
  3. Add shallots and season with salt and pepper. Serve.


Broccolini with Pine Nuts and Raisins (adapted from Epicurious)
Serves 4
  • 1 tablespoon olive oil
  • 1/4 cup pine nuts
  • 1 tablespoon minced shallot
  • 4 lbs. broccolini, ends removed
  • 1/3 cup dry white wine
  • 1/3 cup golden raisins
  1. In a large skillet, heat olive oil over medium heat. Add pine nuts and toast until golden and fragrant,. stirring constantly, about 2 minutes. Add shallot and saute 1 more minute.
  2. Add broccolini, wine and raisins and cover. Saute, stirring occasionally, until broccolini is tender and bright green, 8-10 minutes. Season with salt and pepper before serving.

Saturday, November 26, 2011

The Day After (Black Friday) Part II

Last year I went shopping on Black Friday... and I vowed never to do it again (unless I'm ever really really desperate for crazy discounts and crazy shoppers). So this year I'm giving the day after Black Friday a try. Let's hope it goes well.

I'm not going to lie, I'm kind of scared that there won't be any good things left--discounted or not. But then I might be very wrong since the new stuff might be out by now?

Anyways here is the second installment of our (my cousin's and mine) delicious Thanksgiving dinner.


Stuffing is a must on Thanksgiving. Period. No stuffing, no joy. So here is a very good, and quite simple, stuffing recipe.

Sage Stuffing (adapted from Epicurious)
Serves 4

  • 4 cups coarse bread crumbs (about 1/2 lb. white bread loaf without crust)
  • 2 cups cornbread crumbs (I recommend making a loaf the night before)
  • 3 tablespoons chopped fresh parsley
  • 2 tablespoons chopped fresh sage
  • 1/2 teaspoon salt
  • 1/2 teaspoon pepper
  •  stick unsalted butter
  • 1 medium onion, finely chopped
  • 3/4 cup finely chopped celery
  • 1 egg, lightly beaten
  • 1 cup chicken broth or turkey stock
  • 1/4 cup heavy cream
  1. Preheat the oven to 325 F. Spread bread crumbs on a rimmed baking sheet and bake until dry, about 15 minutes. Cool crumbs in sheet on rack. Once cooled, transfer to a big bowl and mix in parsley, sage, salt and pepper.
  2. In a large skillet, melt butter over medium heat. Add onions and saute until soft, stirring occasionally, about 10 minutes. Add celery and cook, stirring occasionally, for 5 more minutes. 
  3. Add onion and celery to bread crumbs and toss to combine. Add eggs, broth and cream, tossing constantly until well mixed.
  4. Butter a large baking dish. Transfer stuffing to dish and cover with aluminum foil. Bake covered for about 30 minutes. Uncover and bake for another 30 minutes, or until slightly browned. Let cool and serve.


Friday, November 25, 2011

The Day After (Thanksgiving) Part I

It's been a month and a half since my last post.

Whew! That wasn't too hard to say I guess. Either way, I'm not happy with the way posts happened--or should I say didn't happen--this semester. So let me change that.

So lets begin. First here's a very quick update on my life. I am almost done with my fifth, and most hectic semester yet, at BU and I am very happy about it (when I say hectic I mean I have turned into a constantly-neck-pained-and-sleep-deprived student who jumps her roommates' bones for any given reason. It's bad). But still, I am proud to call myself a working girl again and I have been running constantly for the past month--although now I may have to stop no thanks to a mysterious injury.

For Thanksgiving this year I switched coasts; I came to Coronado with my cousin. Let me just say, the weather, even if it's "cold," is absolutely delicious. There's just something so relaxing about coming to Coronado. If it's not the fact that this small city could have been taken out of a painting, it's the fact that it's an island. (In reality it's part of a peninsula, but for these purposes I will pretend like the Silver Strand connecting it to the mainland is nonexistent).

Anyways, we decided to make a gourmet Thanksgiving dinner by taking traditional dishes and turning them into an exciting meal. Yes, it was a small Thanksgiving party this year--just my cousin and me--but let me tell you, the food was absolutely delicious.


First and foremost, you need turkey, but since we weren't about to cook a large bird just for the two of us, we settled on turkey breasts. This recipe is so simple, you won't even know what to do with the rest of your Thanksgiving chef time.

Turkey Breast Medallions with Shallot-Dijon Gravy

For the gravy (adapted from Epicurious)

  • 1/4 cup olive oil
  • 1/3 cup finely chopped shallots
  • 1/4 cup all purpose flour
  • 1/4 cup dry white wine
  • 2 1/2 cups chicken broth (or turkey stock if available)
  • 1 tablespoon dijon mustard
  • 1 tablespoon fresh chopped rosemary
  1. In a medium sauce pan, heat olive oil over medium heat. Add shallots and saute for one minute. Whisk in flour and cook until mixture is light brown, whisking constantly, about 2 minutes. 
  2. Whisk in wine, stock, mustard and rosemary. Bring mixture to a boil, whisking to blend. Boil until gravy coats a spoon, or until desired consistency, whisking constantly, about 5 minutes.


For the turkey breasts (adapted from Epicurious)

  • 1/2 cup flour
  • 3/4 teaspoon cumin
  • 3/4 teaspoon chili powder
  • 3/4 teaspoon coriander
  • 3/4 teaspoon garlic salt
  • 1/2 teaspoon salt
  • 1/4 teaspoon pepper
  • 2 tablespoons olive oil
  • 1 lb. turkey breast (look for ready cut turkey breast or turkey breast medallions)
  1. In a large glass baking dish, combine flour and spices. Heat olive oil in a large skillet over medium heat.
  2. Dredge turkey breast cutlets in flour mixture and place on skillet. Cook until turkey is golden brown on both sides, about 3-5 minutes on each side.


Thursday, October 13, 2011

Tangy Salad

Today was a pretty good day--disregarding classes, homework and the mouse that seems to have turned into our fourth roommate. Ugh.

More about my great day in a second, but first let me tell you that we NEED AN EXTERMINATOR in our apartment. Like NOW! I'm serious though, mice are disgusting little creatures. I don't know how much longer I can manage living under the same roof as one (I'm hoping it's only one that we have).

Ew.

I'm sorry for spamming my food blog with mice speak, but I needed to vent.

Anyways, that's done and over with. Today I finally had time to look through my food magazines and find yummy recipes. I forgot how many folded corners marked the pages of the dozens of magazines in my room. Tons of recipes waiting to be made--and that's not even counting the ones that I was too lazy to mark.


So for tonight I decided to make a salad from a FOOD issue that I had lying around. It's quick, easy and deliciously fresh. I suggest pairing it with roasted chicken or a steak.

Tangy Salad with Apples (adapted from FOOD)

  • 1/4 cup creme fraiche (use sour cream if you can't find it)
  • 5 teaspoons white wine vinegar
  • 1 teaspoon fresh lime juice
  • 1/2 teaspoon honey
  • S & P
  • 1 small lettuce head (I used Green Leaf, because I couldn't find Frisee)
  • 1 Gala apple, sliced thinly
  • 3 tablespoons slivered almonds
  1. In a small bowl, combine the first 4 ingredients. Whisk together with a fork and season with S & P. 
  2. Place lettuce and apples in a large bowl. Pour half of the dressing and toss salad. Add more dressing if needed to coat lettuce and apple compketely. Season with S & P and serve immediately.