Sunday, October 26, 2014

Longing for Winter

I Skyped my parents today and they told me that they've already turned on the heat at home. What!?

Oh, right, forgot we're in October (almost November) and other places--outside of Austin--start getting chilly this time of the year.


I know there are plenty of people who can't deal with cold weather; plenty of people that prefer endless sunny (and warm) days. However, I'm not one of them. I actually enjoy the change of seasons and I certainly don't mind cold weather--I actually like it to a certain extent. And I love snow. Don't get me wrong, I won't spend my years in Austin complaining about the sunny days, because that would just be preposterous. But, every now and again, I'll express my longing for temperatures in the lower digits accompanied by flurries (an inches on the ground) of snow. I'll even take the occasional slush-storm if it means I can have a snow day later on!


In other news, this weeks marks the last of the so-called fun days of my first semester in law school. Apparently I'm about to embark towards the scary depths no-fun November and then the utterly feared finals period in December. I'll try not to fret it too much just yet, but this might be one of the last posts you see this year. But let's hope not.

Here's my dinner from tonight.


Cauliflower pizza! This is a dish I've been wanting to add to my repertoire for quite some time, and tonight I finally got to do so. Yes, it is as odd as it seems (at least to all of us who were oblivious to the wonders of alternative cauliflower uses); and yes it is as delicious as it sounds (at least to all of us veggie-loving-health-freaks). I subbed some ingredients with what I had at home, but I'm sure any pizza topping would taste delicious.


Cauliflower Pizza Crust (adapted from iFOODreal)
Active time: 30 minutes; total time: 1hr15mins.
Makes about 6 servings.

  • 1 head cauliflower (about 7" wide)
  • 1 large egg
  • 1/2 cup parmesan or mozzarella cheese, grated or shredded
  • 1 teaspoon dried basil
  • 1 teaspoon dried oregano
  • Pinch of salt
  • 1/4 teaspoon ground pepper
  1. Preheat oven to 350F and spray a large cooking sheet with cooking spray. 
  2. Rinse cauliflower, remove leaves and cut into florets. Place florets in a food processor (Ninja Blender in my case) and process until it resembles a fine rice mixture; some chunks are fine. Transfer to prepared baking sheet and cook for 15 minutes.
  3. Remove cauliflower mixture from oven and transfer to a bowl lined with 3 layers of cheese cloth. Using your hands, squeeze out as much liquid as you can, patiently squeezing about 15-20 times. 
  4. Bring oven temperature to 450F. Line a pizza baking sheet (or regular baking sheet) with parchment paper.
  5. Transfer dry cauliflower mixture to a large bowl and mix in egg, cheese, spices, salt and pepper. Transfer dough to prepared baking sheet and press with fingers until about 1/2-inch thin. Cook for 20-25 minutes, or until golden .
  6. Remove crust from oven and top with desired toppings. Return to oven and cook for about 10 minutes, or until cheese is melted and toppings are cooked. 


Sunday, October 12, 2014

Not your ordinary pasta

Today was the 2014 Bank of America Chicago Marathon. What does that have to do with me you ask? 


Well, up until a month a go I planned to run it; up until two months ago, I planned to use it to qualify for Boston. Instead here I am, in Austin, on a two-week (possibly longer) running hiatus. 

Needless to say, I'm a sad blogger today. It's not just the fact that I lost a chunk of money buying my entry, or the fact that my medal collection didn't grow as expected. What really hit me was seeing photos and posts of my running buddies. I'm not going to lie, I'm pretty jealous of them. 


I'm jealous of the pre-race jitters they got this past week; of the immense amount of carbs that they had to eat for three days in a row; and of the group run they went on around the windy city on Saturday. I'm jealous of the queasiness some of them felt as they made their way to starting line; or the regret that overcame them as they passed mile 10 and realized they weren't even half way there; or of the annoyance of having to gulp water without trying to splash their faces. But what I'm most jealous about is that feeling of utmost triumph they all (probably) got as they crossed the finish line.


... Anyways. I'll try not to get hung up on it and instead share my dinner from tonight. 

This is the first time I've experimented with spaghetti squash and all I can say is where was this vegetable hiding! Here's a recipe I found online; it's simple and healthy--did you think I'd post otherwise? But it's also delicious and versatile. Sub in marinara sauce for the mushroom add-on or any other addition you would put on pasta and you've got yourself a meal.


Spaghetti Squash with Mushrooms & Shrimp (adapted from Pickled Plum)
Active time: 15 minutes; total time: 50 minutes
Makes 4 servings
  • 1 small spaghetti squash (about 3 lbs)
  • 3 tablespoons extra virgin olive oil
  • 1 tablespoon fresh thyme
  • 4 cups sliced portobella mushrooms (about 16 oz)
  • 1/4 cup parmesan cheese 
  1. Preheat oven to 450F. Line a baking tray with aluminum foil.
  2. Using a large knife, split the squash down the middle--I found it easiest to strike once and then keep sticking (with the knife still in the squash) until it was almost sliced through; then I removed the knife and split the squash with my hands. Remove and discard seeds. Season squash with 1 tablespoon olive oil, salt, and pepper. Place flesh side down on baking tray and cook for 30-40 minutes, until soft and slightly browned on the bottom.
  3. When squash has about 20 minutes left, heat remaining olive oil in a large skillet over medium high heat. Add thyme and mushrooms and cook, stirring, until mushrooms are browned, about 5 minutes. Remove from heat.
  4. Remove squash from oven and set aside until cool enough to handle. Using a large spoon, scrape the inside of the squash into the skillet with the mushrooms. Place over medium-high heat and cook for about 5 minutes, until squash looks golden. 


Sunday, October 5, 2014

Turkey Burgers and Kale

Hello October.


Right. I can't believe it either. It feels like just yesterday I was flying into Austin, nervously waiting to get off the plane and make my move official. No, actually, it feels like not so long ago (January) I was complaining to my parents about how I had nothing to do and I was bored all day. Ha! Don't I wish I could turn back time--or at least stop it.

Well, surprise, I can't! And it's just going to keep going faster and faster--or so I've been told. So I think the only way I'm going to be able to deal with it is with food, food and more food.


Before I get into today's recipe. Let me share my most current woe. Every weekend (almost) I head out to the grocery store on my bike. I bring along my backpack, my two Ortliebs (bike bags), and a spare Whole Foods reusable bag (and no unfortunately I don't shop at Whole Foods on a weekly basis); of course I also bring a list, a pen, and my wallet. But that's it.

As I make my way to the store I wonder if today might be the day when I can fit everything without having to pull aside next to the cash register and organize everything neatly. It's tough, and it breaks my heart, but I always have to choose between an extra yogurt container or another pack of sliced turkey.


Just kidding. It's actually just the quirk that my type A personality needs after a long week of studies. Since I can only fit a certain, small, amount of groceries, I really have to think about what I'll be consuming during the week. And you know what? It's actually not that bad: having to think about each and every thing I buy makes me appreciate that last spoonful of yogurt that much more!

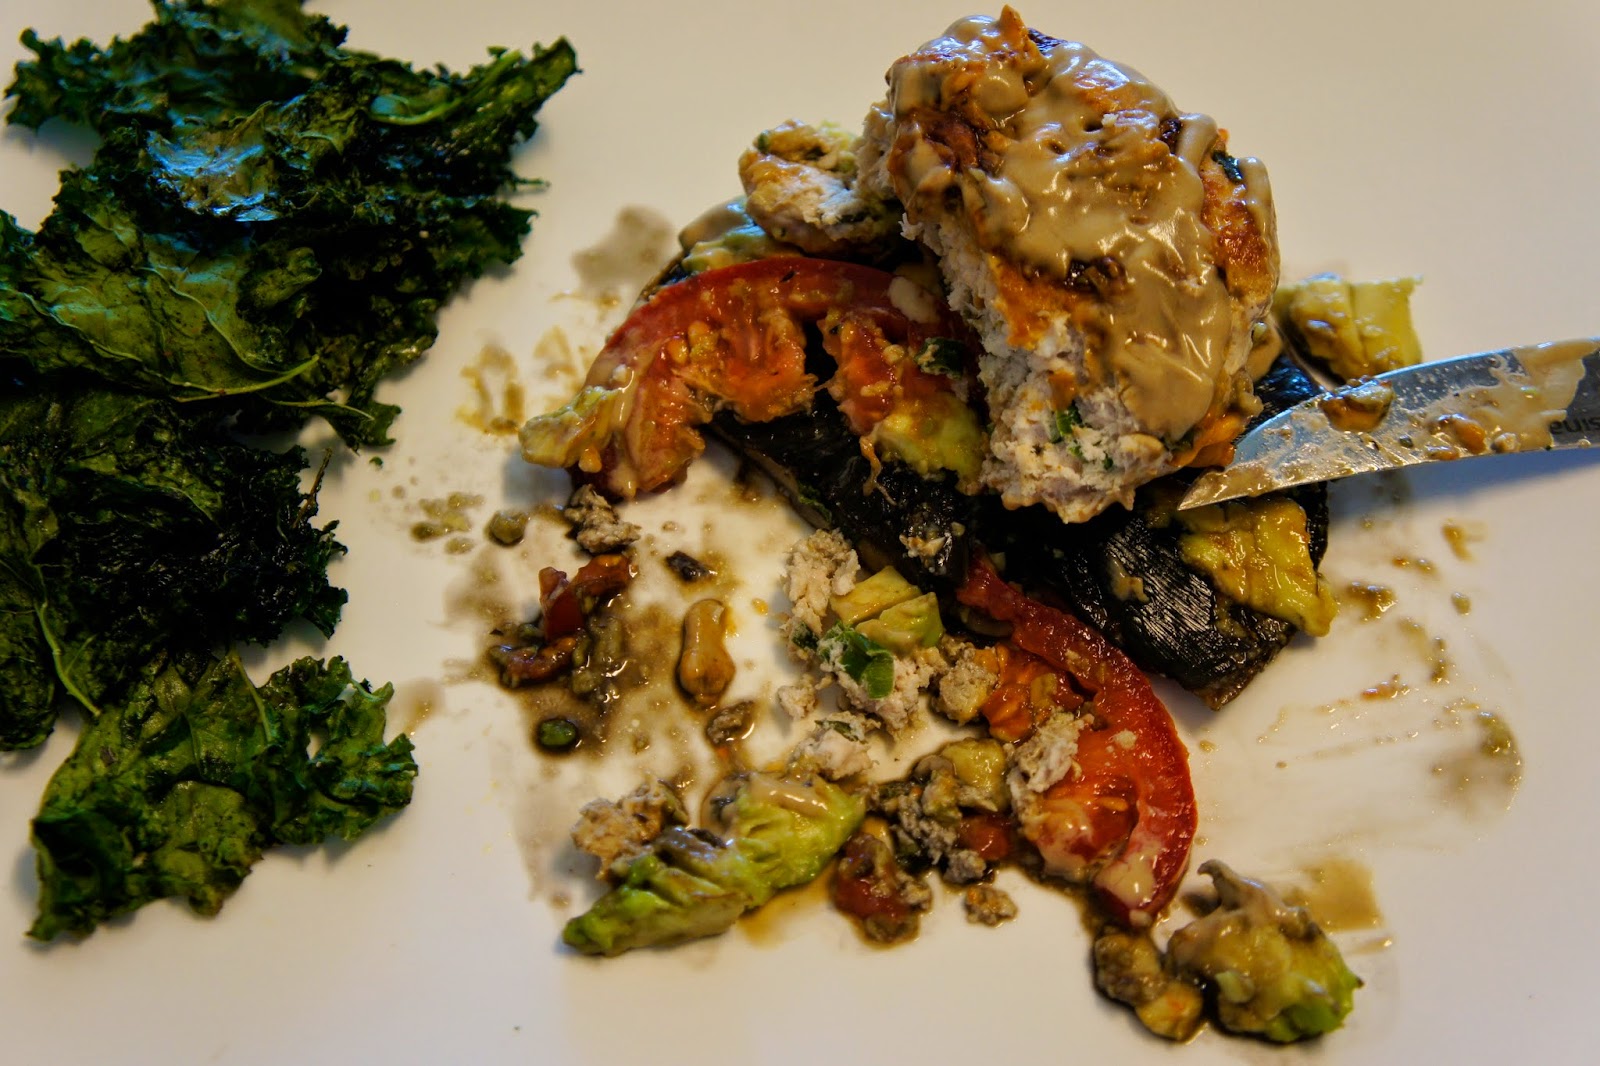
That said, today I was really, really craving a burger. And since my trip to the groceries happened right after my craving, I made it happen. Here's a recipe for a lean turkey burger with a kick. It's simple, healthy, and delicious, so really no excuses for it not being on my (and your) regular meal plan. Enjoy!


Also, I decided to try the whole portobello mushroom bun idea, and while I'm not saying I didn't love it (because I did), there's no reason these can't be in-between regular burger buns!

Turkey Burgers (adapted from Real Simple: Easy, Delicious Home Cooking)
Active time: 20 mins; total time: 30 mins.
  • 4 portobello mushroom caps
  • 1 lb. ground turkey (99% lean; or 93% lean)
  • 3 green onions, sliced thinly
  • 1 tablespoon Dijon mustard
  • 1 tablespoon fresh thyme leaves
  • 1 tablespoon olive or coconut oil

  1. Preheat oven to 400F. Spray portobello caps with olive oil spray and season with salt. Place portobellos on a baking dish and cook for 10 minutes; flip over and cook for another 10 minutes or until steamy. Prepare the meat while you wait for the mushrooms to cook.
  2. In a medium bowl, combine turkey, onions, mustard and thyme; using your hands, mix gently until onions and thyme are distributed. 
  3. Form four 3/4-inch patties and season with salt and pepper. 
  4. In a large skillet, heat olive oil over medium heat. Cook patties until cooked through, and golden, 6-8 minutes on each side. 
  5. Serve burgers over portobello caps and top with favorite burger toppings!
Here is the recipe to the kale chips I prepared on the side. 


Monday, September 15, 2014

Que Viva Mexico!

For those of you who don't personally know me, who are visiting my blog for the first time, or who haven't really paid attention to my ever-so-apparent love for Mexico, here's a post to clarify.

I love Mexico; Adoro mi pais. 


Yes. Despite my looks, which often lead people to believe I simply moved to Mexico for a bit and thus call it the "place where I'm from"; despite my lengthy time spent abroad for studies or travels, which can be misunderstood as a flee-tactic; despite my writing in English--including journal entries, thoughts, blog posts and book chapters--which can mislead people into thinking that I purposefully avoid the Spanish language (see note below); I absolutely love my country. And I'll continue to express my love as long as I can.


I won't apologize for instances of crazy excitement following an encounter with fellow Mexicans abroad; I won't apologize for breaking out dance moves whenever the rhythm kicks in; and I won't apologize for making my nationality evident.

In fact, as long as I continue to live abroad--and judging by the career path I've chosen, that is likely to be the case--I'll continue to profess my Mexicanness in any and every way possible. For instance, suggesting that you (my non-Mexican and Mexican-abroad readers) YouTube El Grito de la Independencia (or tune in live tonight at 10:45 central time).


Phew. Enough said? I think so.

And now for food...


I realize this dish is mostly not-Mexican, but it's more about what it represents than the cuisine under which it falls. Quiches are French, wilted spinach is probably multi-national (I couldn't find origins in my quick research), and the diced tomatoes have both a Mexican-lime and an Italian-oregano flair. Still, the mini quiches proved to be a perfect meal for me. They're healthy and filling. And most importantly, one recipe was enough for more than a weeks worth of leftovers!

One thing I'll advise is the use of cupcake liners. I didn't use them--per the recipe I used for this post-- and greatly regretted it when I found myself scrubbing my pans. Cooking spray will only go so far. Enjoy!


Crustless Spinach and Mushroom Mini Quiches (adapted from Will Cook For Friends)
Makes about 16 cupcake-sized.
Active time: 30 mins; total time: 60 mins.

  • 1 teaspoon coconut oil
  • 1 cup red onion, finely diced
  • 10 eggs
  • 1/2 cup 2% Greek yogurt
  • 1/4 cup milk
  • 2 tablespoons chopped parsley
  • 2 tablespoons chopped basil
  • 1/4 teaspoon salt
  • 1/4 teaspoon pepper
  • 1 cup chopped spinach
  • 1 1/2 cups chopped mushrooms
  • 1/2 cup shredded mozzarella cheese
  1. Preheat oven to 375F and line cupcake pan (I greased but not so convenient) with cupcake liners. *You will have to reuse the pan or use another one for the remaining 4 quiches (if using a regular 12-cupcake pan)
  2. In a medium saucepan, heat coconut oil over medium-high heat. Add diced onion and sauté until slightly tender, about 5 minutes.
  3. In a large bowl, whisk together eggs, yogurt, milk, parsley, basil, salt and pepper. Add chopped veggies and stir to combine.
  4. Pour mixture into cupcake tins, filling up to about 1/4-inch from the top. Add a teaspoon of cheese to each mini quiche, slightly pressing to submerge it. 
  5. Bake quiches for 20-25 minutes, or until egg is set and top is shiny. Remove from oven and let cool for 10 minutes. *If not using cupcake liners, use a bread knife to carefully remove from pan. Serve warm.

**So why don't I write in Spanish rather than English? I've taken more classes/courses on writing in English, so it comes more naturally to me. Also, within the past six years (during which my blog started), I've lived in an English-speaking country for the majority of the time.

Sunday, September 7, 2014

Fish & Quinoa

So the fire alarm in my building went off today. At 7:47 a.m.

I'm assuming it was a false alarm, but we weren't actually informed otherwise. Ten minutes after the piercing sound woke me up from my deep sleep, the torture stopped and everyone walked back into the building. I followed, dragging my feet up the five flights of stairs to my apartment.


The only upside--if any--to this terrible event was the head start I got on my studies. But I guess that's  up for debate.

Anyways, tomorrow is the first day of my third week of law school. So far so good. Yes, I'll admit there is a lot of reading involved, but call me a law nerd, because I've mostly enjoyed it--except for the uber-overwhelming and seemingly infinite amount of property terms.


On another note, I've figured out a way to go grocery shopping without a car: my backpack, two bike bags and an extra reusable bag. Thankfully the bike ride is only about five minutes because the extra weight really does kick in.


Here is my dinner from tonight: grilled cod with caramelized onions and orange-avocado salsa and carrot zucchini quinoa. On hindsight, I probably would've paired the fish with a cucumber salad or something fresh, but I wanted to cook quinoa for leftovers during the week. It's all about practicality now that I'm a lawyer-in-training. Enjoy!


Cod with orange, avocado and onions (adapted from Bon Apetit: Fast Easy Fresh Cookbook).
Makes 2 servings.
Active time: 15 minutes. Total time: 25 minutes.

  • 1 medium navel orange
  • 1/2 cup avocado cubes (about 1/3-inch)
  • 2 teaspoons minced jalapeño 
  • 2 teaspoons lime juice
  • 2 teaspoons coconut oil
  • 1/2 cup chopped red onion
  • 2  6 oz. cod fillets
  • Parsley for garnish
  1. Cut and peel orange ,removing white pit; carefully separate sections and cut in half. Combine orange sections, avocado, jalapeño and lime juice in a small bowl; stir gently to blend. Season with salt and pepper.
  2. In a medium skillet, heat coconut oil over medium heat. Add onions and cook, stirring occasionally for about 5 minutes, or until slightly browned. Sprinkle fish with salt and pepper; transfer to skillet and sauté until brown and cooked through, about 5 minutes on each side. 
  3. Serve fish topped with salsa; garnish with parsley. 
Spiced carrot and zucchini quinoa (adapted from Bon Apetit: Fast Easy Fresh Cookbook).
Makes 4 servings.
Active time: 20 minutes. Total time: 30 minutes.
  • 2 cups water
  • 1 cup quinoa, rinse and drained
  • A pinch of salt
  • 2 tablespoons olive oil
  • 2 medium carrots, peeled and cut into small cubes
  • 1 medium zucchini, cut into small cubes
  • 1 teaspoon paprika
  • 1 teaspoon cumin
  • 1/2 teaspoon cinnamon
  1. Combine first four ingredients in a large saucepan over medium-high heat and bring to a boil. Lower heat to medium-low and cover; simmer until water is absorbed, about 20 minutes.
  2. Meanwhile, heat olive oil in a large saucepan over medium heat. Add carrots and sauté until tender, about 5 minutes. Add zucchini and sauté, about 3 minutes. Add paprika, cumin and cinnamon.
  3. Remove skillet from heat and add quinoa. Toss to blend and season with salt and pepper.

Monday, September 1, 2014

Welcome to Austin

New city, new school, new apartment, new kitchen... same old me! Welcome to Student Savor: Austin Edition.

It's been two weeks since I moved here and I must admit I'm loving it so far. I come with high expectations--having cities like Boston and DF to compare--but it seems Austin will meet and surpass them in no time.


I'll hold my verdict on the city until a later post--given that I've barely seen it in through the eyes of a local--but I will admit that in terms of food and social life, Austin is amazing! I have yet to visit 6th Street in all its glamour (or lack thereof) and I still have to attend one of the infamous music festivals (I'm going to ACL in October!). But the restaurants, bars, events, etc. I've been to have proven to be enough to keep me smiling.

On another note, the weather is not to my liking. I appreciate the sunny mornings and blue skies until 8 p.m., but I'm in not okay with the constant temperature over 30 degrees Celsius (86 Farenheit). Sure it may be the time of year; and sure I may have to learn to deal with it now that I live in Texas; but I never thought I would miss the New England wind chill as much as I do now.


Moving onto the main course--pun intended--here's a recipe I adapted from my favorite cookbook to make a healthy version of Salmon with Beurre Rouge. It could've been that I was starving, but I actually think this dish turned out quite delicious--and clearly photogenic or it wouldn't be on here. It's also a quick and simple recipe that can be adapted to other fish filets or even a chicken breast. Enjoy!


Salmon with Coconut Wine Butter (adapted from How to Cook Everything)
Makes 2 servings
Active time: 20 minutes; total time: 30 minutes.

  • 2 tablespoons diced shallots
  • 1/2 cup white wine
  • 4 tablespoons balsamic vinegar
  • 2 salmon filets (about 1/3 lb. each)
  • 2 tablespoons coconut oil
  1. In a small saucepan, combine shallots, wine, and 2 tablespoons vinegar over high heat. Cook until reduced to about half, stirring occasionally. 
  2. Season salmon with salt and pepper. Preheat a medium saucepan over medium heat. Add salmon filets, skin-side up and raise heat to medium-high. Cook until crispy, about 5 minutes and flip over; cook for another 3 minutes, then 1 minute on each side, until filets are cooked through. 
  3. Once sauce is reduced, reduce heat to medium-high and add the coconut oil one tablespoon at a time, stirring to mix well. Add remaining vinegar and continue to cook until mixture reduces to about half again, about 3 minutes.
  4. Place salmon on plate and spoon sauce before serving.

**I served the salmon with thinly sliced zucchini marinated in balsamic vinegar and olive oil and sautéed over high heat.

Wednesday, July 2, 2014

Fruity Goodness

These days, I seldom have dessert--or at least compared to my regular dessert-wholfing habits. If you know me at all, you know that I basically live for dessert, which is why cutting it out of my diet (for marathon training purposes) has been so hard. It's been more than three months of intense training and I have yet to go a full week--maybe even a day--without a bite of some kind of sweet.

People said there's fruit; people said I'd get used to fruit as dessert. People said--and continue to say--a lot of nonsense.

No I haven't gotten used to eating fruits as dessert and no I haven't abandoned dessert altogether (nor will I in the remaining week and a half of my training). What I have done, is create scrumptious fruit-based desserts to satisfy my sweet tooth.


This one in particular was a friend's request. It turns out my mom's variation of this raspberry crumble from six years ago turned into an all-time favorite. And even though this was my first time making it, baking it once is enough to vouch for the taste and easiness of the recipe.


Boysenberry Crumble (adapted from Gourmet)
Active time: 30 mins. Total time: 3.5 hours
Makes about 10 servings

  • 2 1/2 cups all-purpose flour
  • 3/4 cup cold unsalted butter, cut into 1/2-inch cubes
  • 1/4 cup cold vegetable shortening
  • 1/2 teaspoon salt
  • 5-7 tablespoons ice water
  • 3/4 cup chopped almonds
  • 3/4 cup sugar
  • About 6 cups frozen boysenberries (or fresh if available)
Dough

  1. Pulse flour, butter, shortening and salt in a food processor (or mix with your fingertips) until mixture resembles coarse meal with small pea-sized lumps. Transfer 2 cups mixture to a bowl; and reserve the rest.
  2. Drizzle 4 tablespoons ice water evenly over the 2 cups mixture; stir gently with a fork until incorporated. Squeeze a handful of dough, if it doesn't hold together, add more ice water (1/2 tablespoon at a time), stirring until incorporated. Be careful not to overwork dough or pastry will be tough. 
  3. Turn out dough onto work surface and divide into 4. With the heel of your hand, smear each portion once or twice to help distribute the fat. Gather all dough with pastry scraper and press into a ball, then flatten into a 5-inch disk. If dough is sticky, dust lightly with additional flour. Wrap dough in plastic and chill until firm, at least 1 hour. 
Pie
  1. To make topping, add almonds and sugar to remaining dough mixture and rub together to form some large clumps. Set aside.
  2. Place a large baking sheet on the lower third rack of the oven and preheat to 375F. On a lightly floured surface, roll out disk dough into a 13-inch circle. Fit into tart pan and trim excess dough, leaving a 1/2-inch overhang. Fold overhang under pastry and press against rim to reinforce edge. 
  3. Fill pie shell with berries and sprinkle evenly with topping.
  4. Place tart on the baking sheet and bake until topping and crust are golden and the filling is bubbling, about 1hr. Loosely cover with a foil sheet after 30 minutes to prevent dough over browning.
  5. Cool in pan on a rack 30-40 minutes and serve warm.

Sunday, June 22, 2014

Hot Pink

Hello blogosphere. I'm here for the day (and maybe a couple more depending on my schedule and inspiration this week) because I wanted to showcase the ravioli I made for dinner the other day.


I had a few friends over for dinner so I thought I would treat them to home made pasta. Kill two birds with one stone: surprise my friends with a unique dish (which turned out to be a crowd pleaser) and gather material for my almost abandoned--keyword almost--food blog.


Before I move onto the recipe let me write an update on my life. I'm officially three weeks away from my first marathon! I can't begin to explain how excited and scared I am. Even though my initial fear of not finishing was obliterated by months of hard training and disappeared somewhere along week 12, a new fear has emerged in its place. I'm now terrified of not reaching my goal of a Boston Qualifier.

In a way, I'm happy I still fear something because it's making me challenge myself and stay focused on the running ahead. But at the same time, I'm anxious for the day to come when I can turn my dream into an achievement.


Ok. Enough writing about my running--I don't want to jinx anything--here is the recipe to these delicious and photogenic beet ravioli. I'll link to the pasta recipe, but if that is too much for one go, wonton wrappers are a good substitute (or so Epicurious says). Still, if you have the time and the motivation, I recommend making the pasta dough too; no need for a pasta machine and completely worth it.


Beet Ravioli with Poppy Seed Butter (adapted from Epicurious)
Makes about 60 ravioli.
Active time: 45 mins. Total time:

  • 2 red beets (about 14 oz.)
  • 1/2 cup ricotta cheese
  • 2 tablespoons dried breadcrumbs
  • 1 1/4 Fresh Egg Pasta (or other pasta recipe)
  • 1/2 cup butter
  • 1 tablespoon poppy seeds
  • 1/4 cup freshly grated parmesan cheese + extra for serving

  1. Preheat oven to 400F. Wrap beets individually in foil and place on baking sheet. Roast until tender when pierced with knife, about 1 hour. Open foil and let cool.
  2. Peel beets and finely grate. Add ricotta cheese and season with salt and pepper. Stir in breadcrumbs.
  3. Prepare a baking sheet by placing a layer of plastic wrap (or half of a clear plastic bag) and sprinkle it with flour. Roll pasta dough into sheets according to recipe above. Working with one sheet at a time, using a 3-inch round biscuit cutter, cut 7-8 rounds out of each sheet. Transfer rounds to prepared sheet, lightly sprinkle with flour and cover with another layer of plastic. Repeat with remaining dough.
  4. Sprinkle two smooth kitchen towels with flour and set aside; place a small bowl of water next to work surface. Working in batches, place pasta rounds on work surface and spoon 1 teaspoon beet filling onto half of each round. Dip fingertip into water and dampen edge of the round; fold over the filling, pushing out as much air as possible and pressing edges to seal. Transfer sealed ravioli to prepared towels. Repeat with remainder. 
  5. Melt butter in a large skillet and stir in poppy seeds; keep warm. Working in batches, cook ravioli in a large pot of salted boiling water until tender, about 4 minutes each. Using slotted spoon, transfer to skillet with butter and toss to coat. Transfer ravioli to serving dish and and sprinkle with 1/4 cup parmesan. Serve warm and with extra parmesan cheese.


Monday, April 7, 2014

Let Me Try This (Marathon Training) Again.

Well hello there blogosphere! It feels good to be back.

In case you were wondering, I've been absent due to moving, travels and endless meals cooked for me (instead of by me). Nonetheless, I've missed the kitchen and it was just a matter of time until I returned.


Once again, I'm training for a marathon--hoping to complete the training this time sans injury--and trying to eat better in the hopes that I'll achieve my "racing weight" (see Matt's book for reference). For that reason, I've found myself scouring the interwebs in search of healthy, yet yummy, recipes. Keep in mind that I'm back in Mexico (see previous posts about moving away from Boston), so some ingredients listed in the multiple recipes I've pinned are hard to find. For instance, unsweetened applesauce. Don't ask me why, but us Mexicans apparently don't consume unsweetened applesauce--maybe that's why we top the fat countries list? So, for recipes like the one below, I had to make my own applesauce.


Regardless, I'll keep searching for healthy recipes and post experiments from my runner's diet. I hope you enjoy my journey (for the second time) into marathon training nutrition (sort of).


Peanut & Almond Butter Protein Muffins (adapted from Veggie and the Beast)
Makes 12 muffins.
Active time: 15 minutes. Total time: 30 minutes + cooling

  • ¾ cup whole wheat flour
  • ½ cup oats
  • ¼ cup flaxseed
  • 1 teaspoons baking powder
  • ½ teaspoon baking soda
  • ½ teaspoon ground cinnamon
  • ¼ teaspoon salt
  • ½ cup natural unsweetened applesauce
  • 1/3 cup creamy peanut butter
  • 1/3 cup almond butter
  • 3 tablespoons agave nectar
  • 3 packets Stevia
  • 1 large egg
  • 2 teaspoons vanilla extract
  • ½ cup 2% plain Greek yogurt
  1. Preheat oven to 375F (180 C); line (or grease) a 12-muffin pan and set aside.
  2. In a medium bowl, whisk together the flour, oats, wheat germ, baking powder, baking soda, cinnamon and salt. Set aside.
  3. In another large bowl, stir together the applesauce and peanut butter. Mix in the honey, sugar, egg, and vanilla, and then stir in the greek yogurt.
  4. Slowly mix the dry ingredients into the wet mix and stir to combine. Divide batter among 12 muffin holes.
  5. Bake for 15 to 18 minutes or until a toothpick inserted in the center of a muffin comes out clean. Let cool completely before storing and store in airtight container